Work has been progressing slowly on the car gauges. I’ve got the esp8266 providing a webpage and displaying data on an ssd1306 based oled display. I saw these larger ssd1305 based displays, and thought I’d give them a try. I ordered a few, and when they arrived I realized they were I2C not SPI. I toyed with the idea of using them as is, but:
- I already wrote the spi driver.
- I have to implement a hardware i2c mux.
- I2C is way to slow.
The display is based on a UG-2864ASGGG14, which does parallel, I2C and spi. So I decided to do some surgery on the controller board to convert them to SPI. Here are some pictures of the progress:
Here the big oled is running in I2C directly from the arduino, the little one is running from the esp8266 SPI.
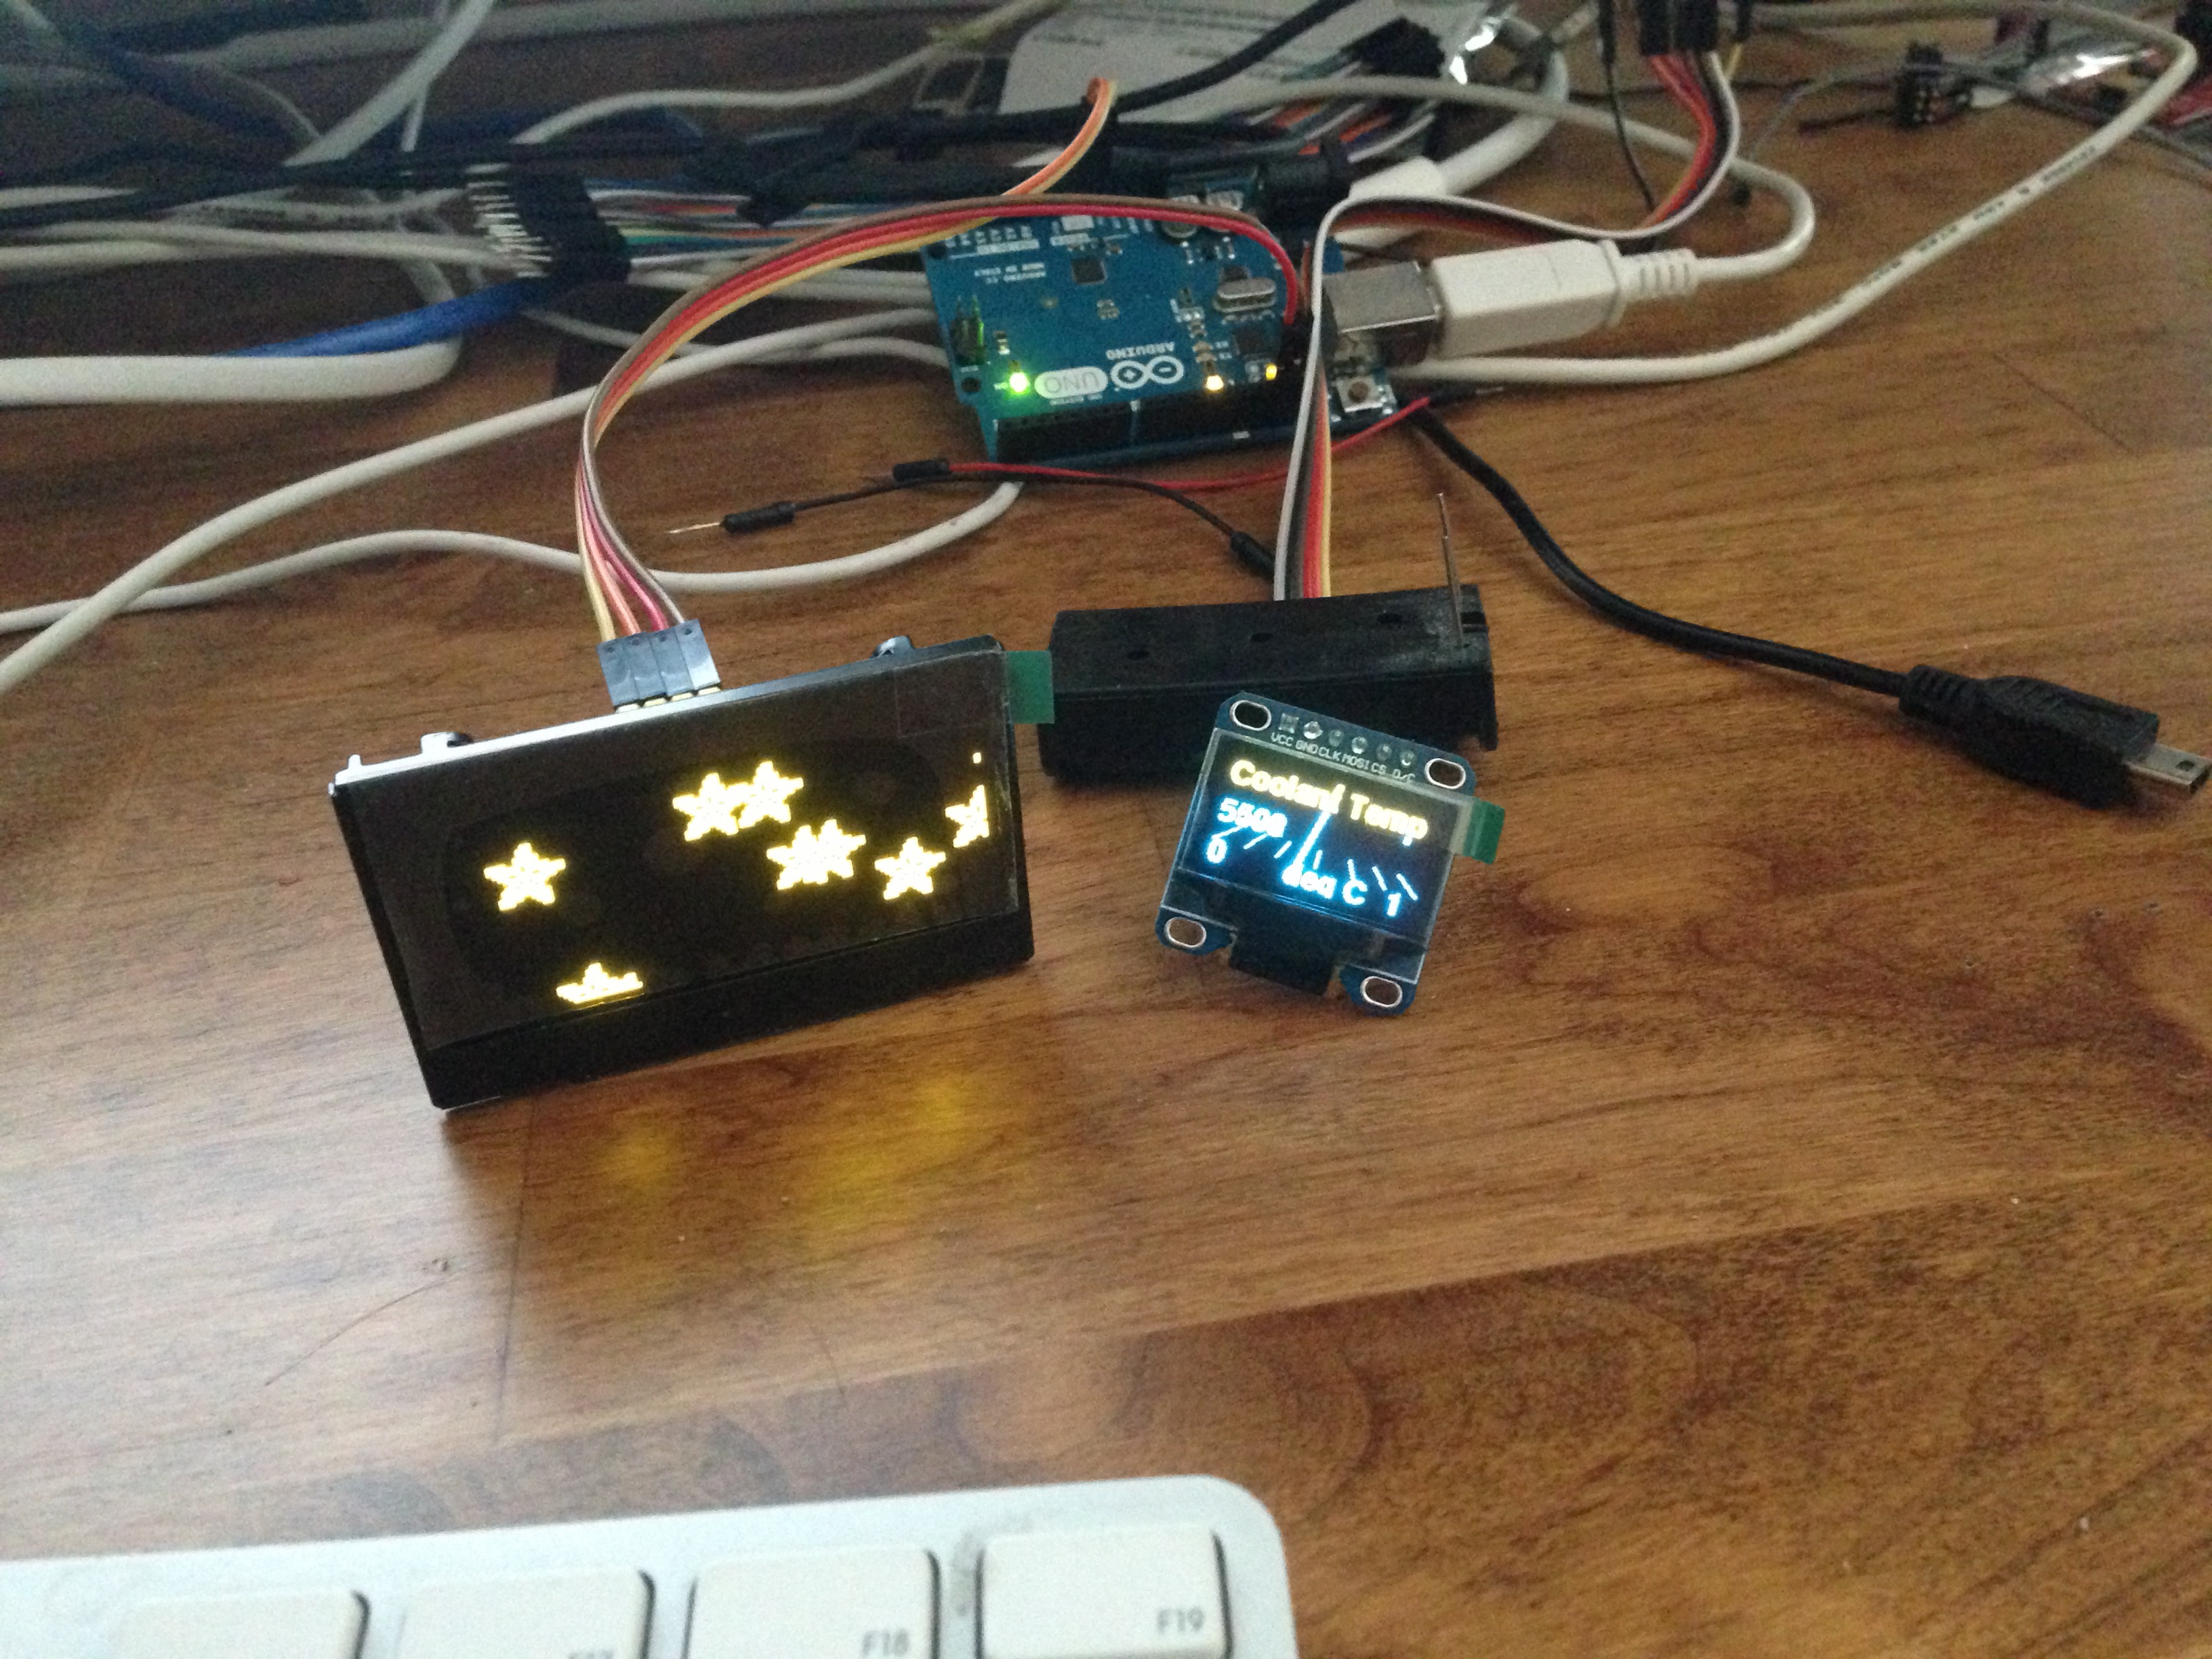
The big OLED vs the little OLED
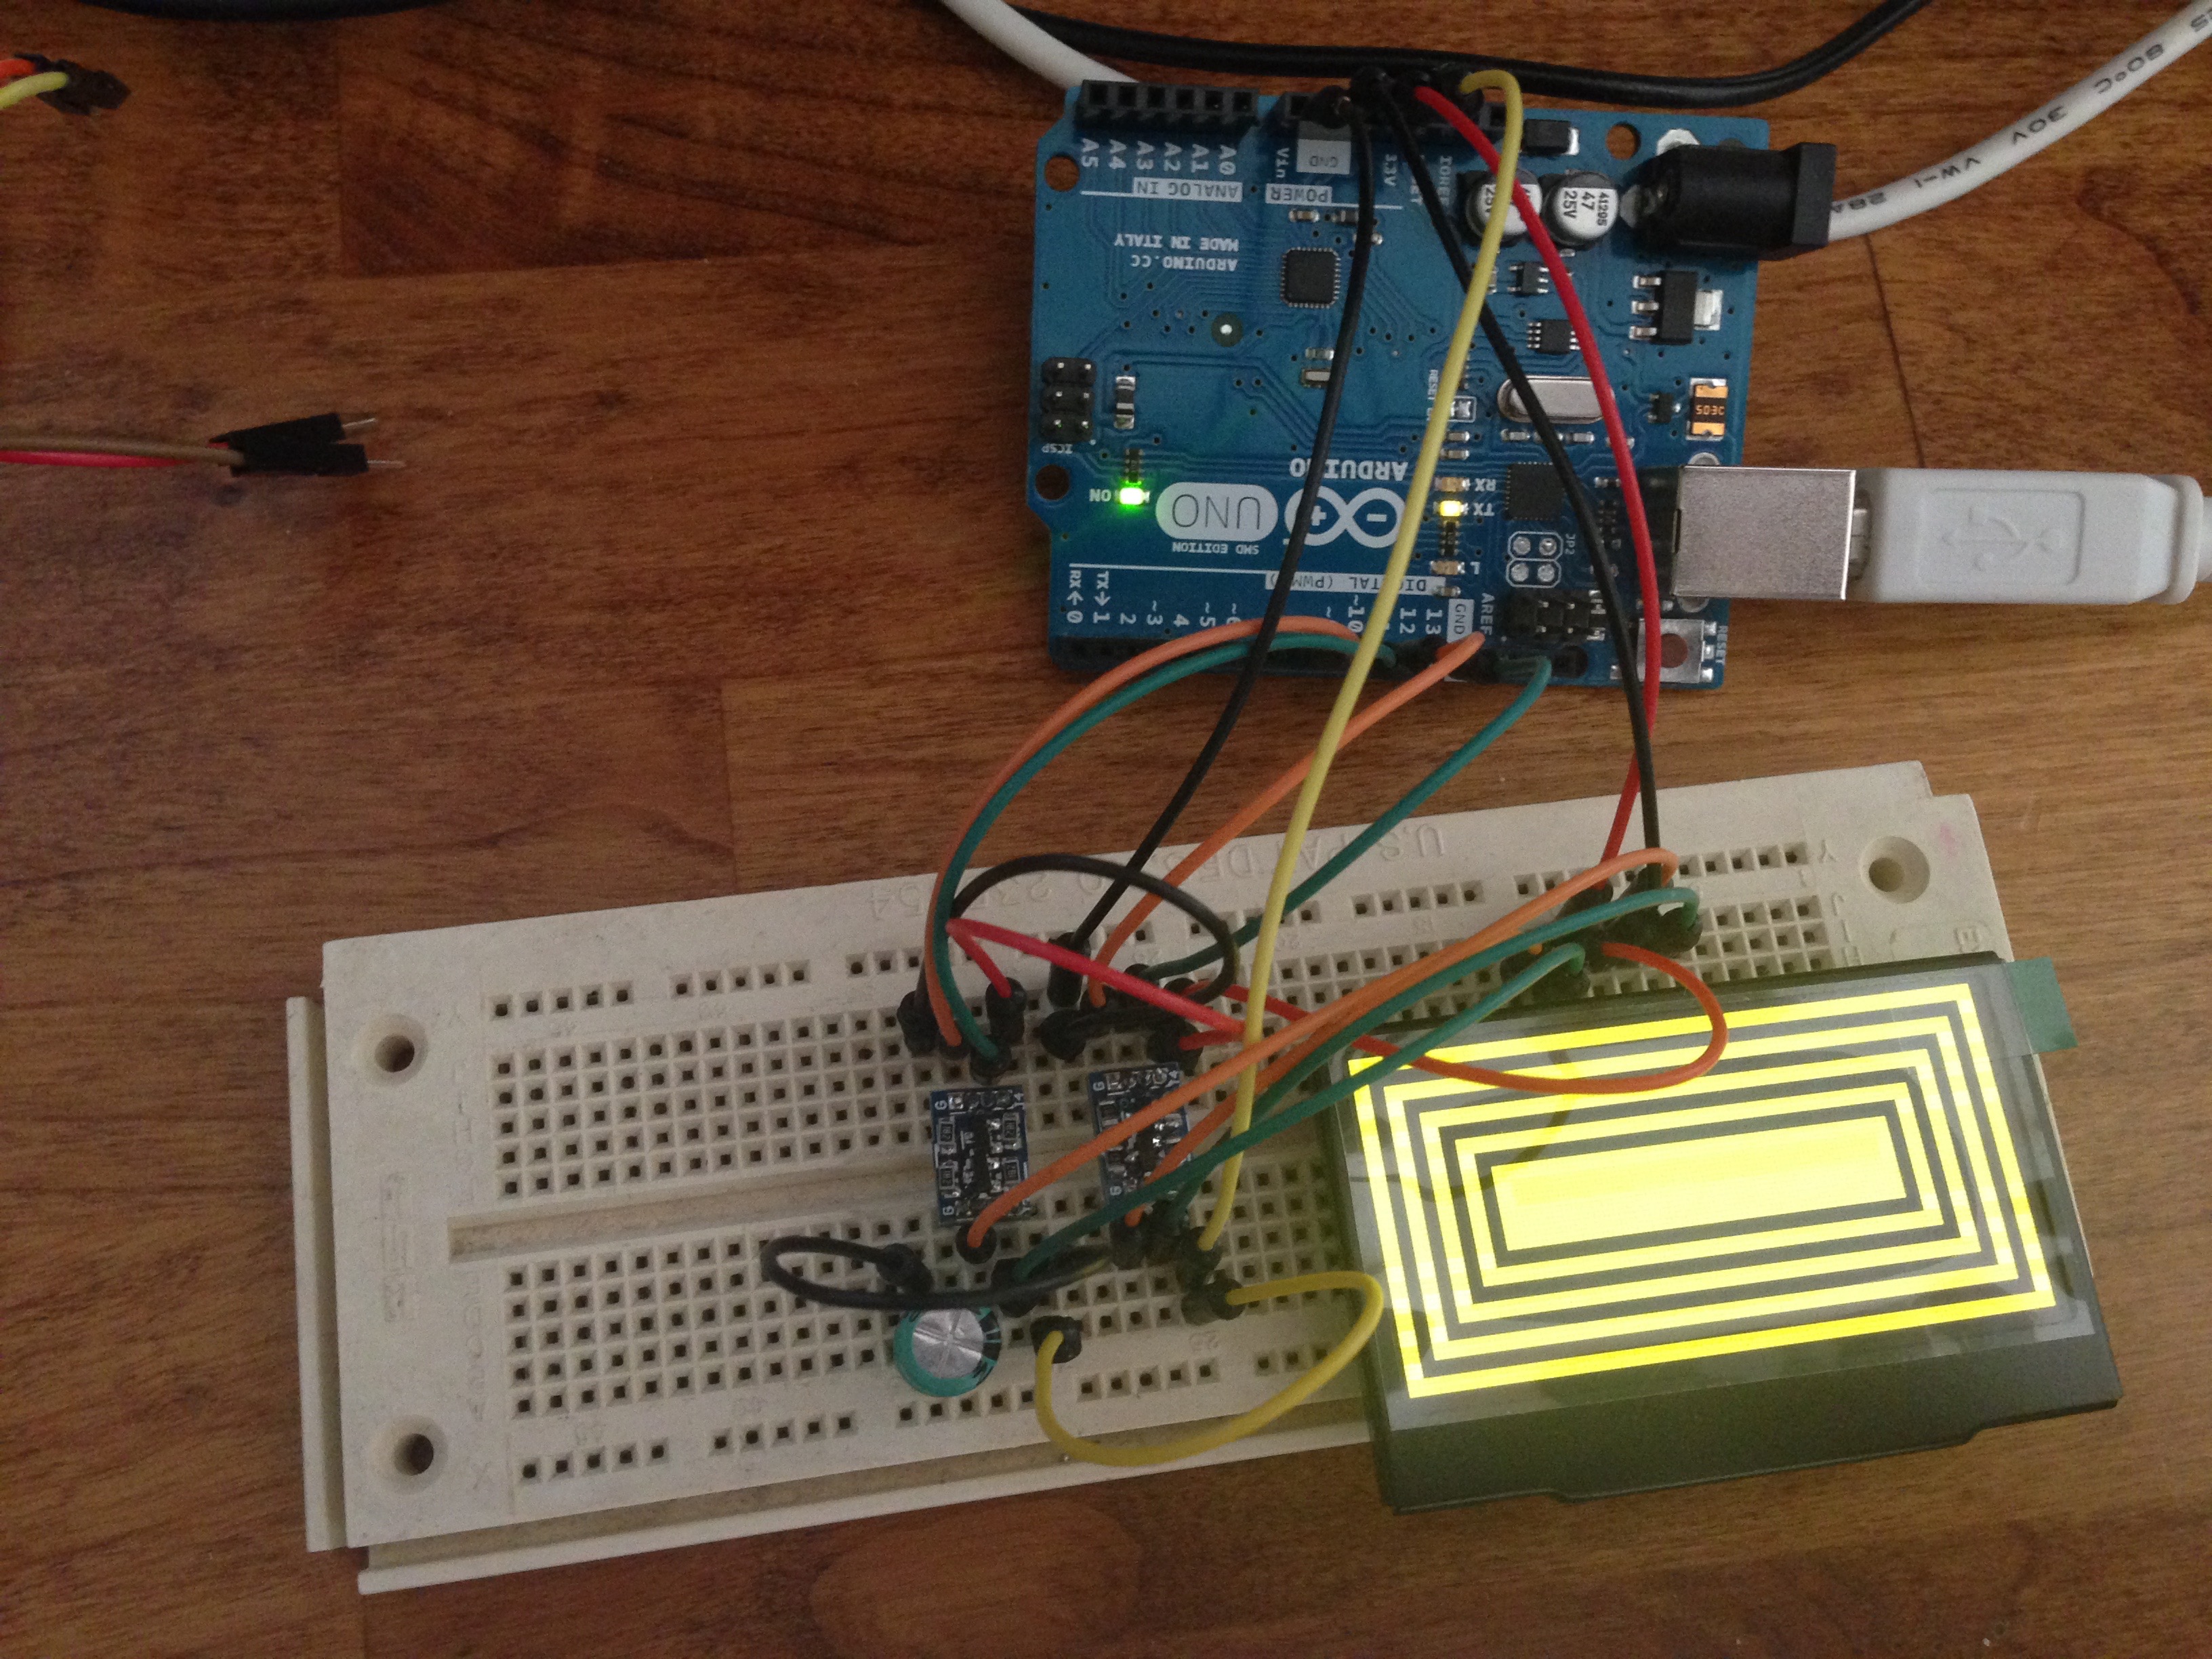
Here the OLED driver board has been converted to spi. The it is hooked up to the arduino with some BSS138 FETs wired up as bidirectional level shifters. The display logic runs at 3v, but the driver board also needs 5v to run the boost converter for the OLED drive.
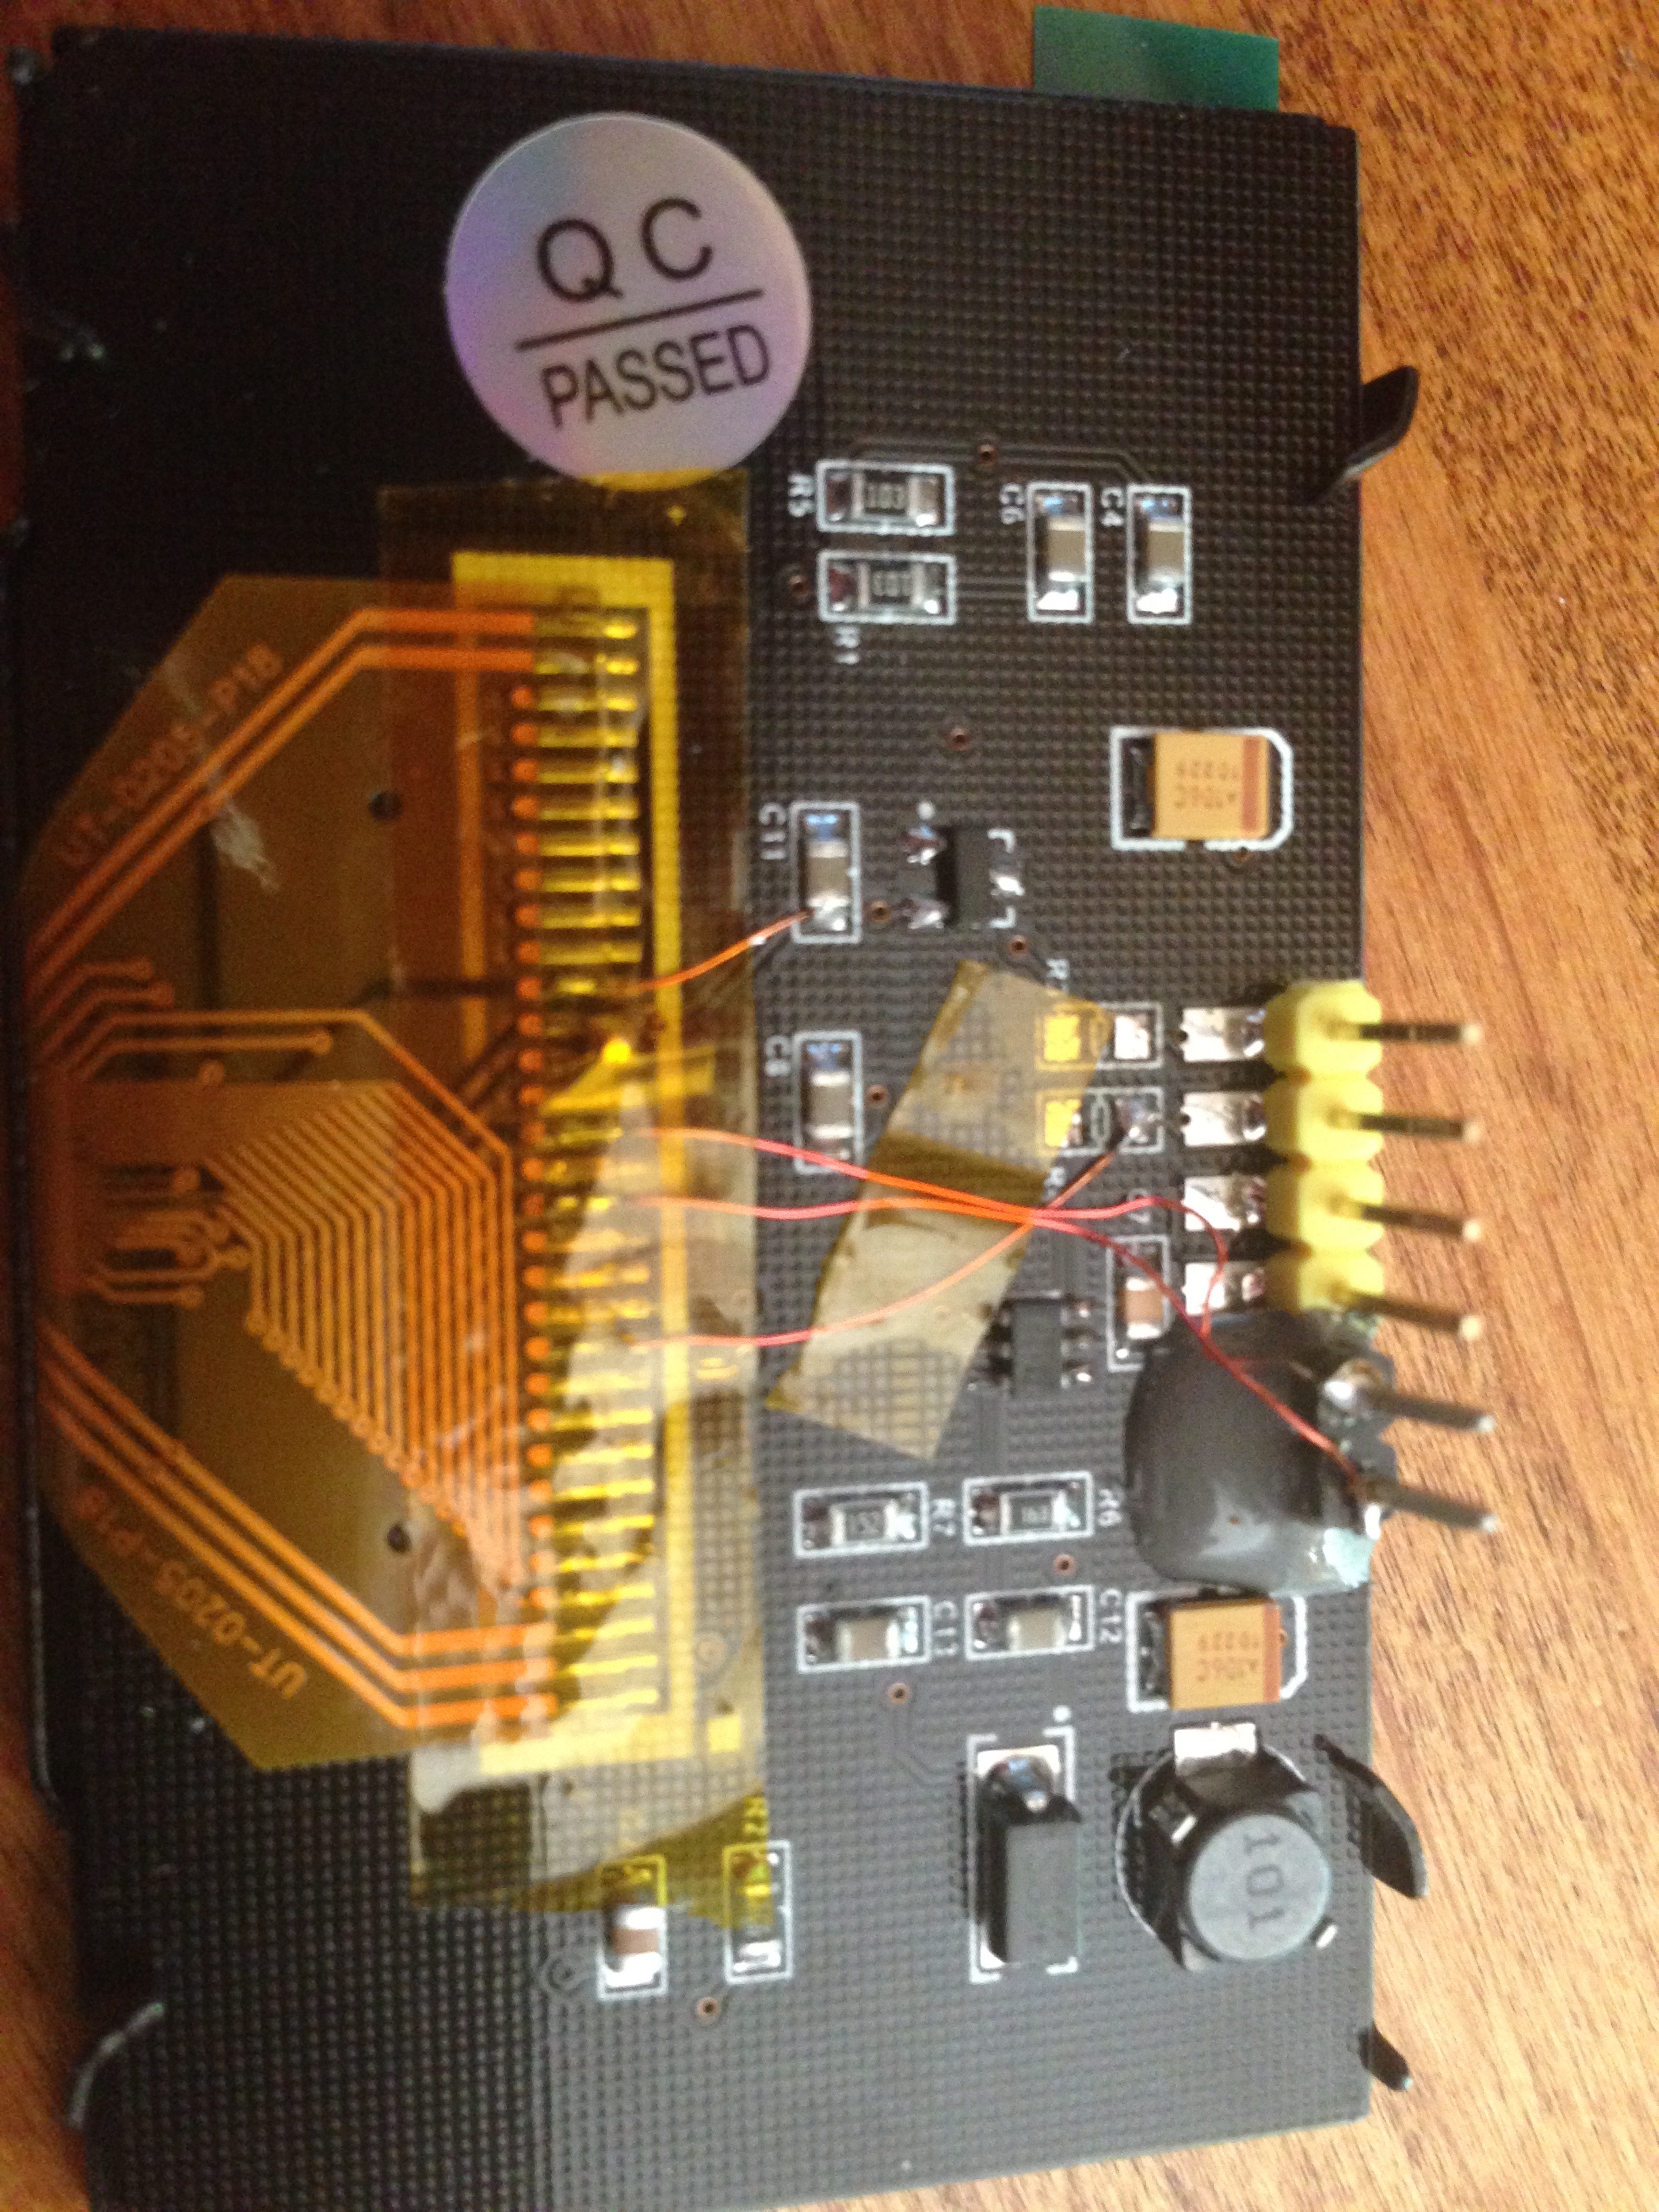
Here is the modified OLED board. It needed the following changes:
- remove the pullups on the clock and data lines. (just remove the resistors)
- Change the mode selection. This should have been easy but the way the circuit board was laid out VDD on pin 21 was connected to pin 20, which was pulled high. So pin 21 was isolated, and wired high (top flywire on the flat flex), 20 was solder-blobed to pin 19.
- Isolate DB2. Again this required isolating the pin, which DB1 was connected to, so DB1 (SDA/SDIN) was fly-wired directly to the connector.
- CS# and D/C# were brought out to new header pins. (I love JB Weld). This mod was tough, since I had to cut the kapton on either side of these flat flex pins, isolated them from the circuit board with more kapton, and solder directly to them.
If I had a do-over I’d simply desolder the whole FFC, rework the board and resolder, but I didn’t know where the traces were going before hand. The ground plane and dark solder mask didn’t help things.
The next task is to hook the display to the esp8266, and see if there is any work to port the ssd1305 driver, or maybe the existing 1306 driver will magically work. I think it is supposed to after reading the propaganda on this part.
update: It turns out the modified display runs on the esp8266 with no software mods required. So this does appear to be compatible with the 1306